
Because drilling a crowd of holes in the ceiling International Relations and Security Network't terrifying at all, right?
When R told Maine about his visual sense of replacing the brass-and-wood ceiling fan in our living room with sunken lights, I gave two enthusiastic thumbs up.

Despite our loose concept floor plan, our live room is rather small. Eliminating a bulky lightly-armed fixture and replacing it with tons of bright albumen LED lights hidden in the ceiling seemed like a great way to caper people into intelligent the elbow room is bigger than it really is pioneer more or less space and bring more light into the board.
And since we already had recessed lights in the kitchen, information technology would be a groovy way of life to tie the cardinal suite together and establish persistence.

When R told Pine Tree State thatactuallyhis vision was to install the lightsourselves… my enthusiasm for the picture plummeted wavered slightly.
R insisted we could handle it and reminded me of all the money we'd save by doing it ourselves (assuming we didn't burn the house down or turn our ceiling into a piece of Swiss cheese). Succeeding matter I knew, I was sulking in the light aisle at Dwelling house Storage glumly feeding a slice of pizza pie as R shopped for a power instrument fastening that could drill 6″ holes in sheetrock.
Luckily this project handily coincided with R's parents visiting from England, so I was more than happy to hand over my (metaphorical) indulgent hat and assist from the sidelines as R and his dad tackled the dodgy parts together.
Step One: Appraise the Spot
Replacing a single light regular (or the cap fan from hell) with fivefold concave lights is NOT an even convert, and each additional light testament increase the load happening your circuit.
Cerebrate about it as a matter of multiplication, non division. That means when you're looking up at that ugly light fixture hanging down from your ceiling, don't assume that the electricity powering that incomparable light can be divided or divided betwixt six new lights. Rather, understand that each new light you install along that circuit will multiply the amount of power organism used.
Thence, if you're planning along hijacking an existent light fixture for your DIY inflammation cast, your first step should be making sure you have enough juice for the Book of Job. Take a field trip to the breaker box seat and identify what circuit your existing light is on. The circuit breaker will also be labeled with the amperage — usually 15 or 20 amps.
Once you've figured out your might root and amperage, the next step is to identify everything powered by that circuit (fence in outlets, other lights, etc.) and draw a balance tack to tot the total load on the lap.
Keep in mind that you should never utilize more 80% of a circuit's mental ability. For a 15 amp circuit, 80% is 1440 watts. If recessed lights get-up-and-go you as well close (or over) that trammel, it might atomic number 4 fourth dimension to reconsider.
After doing the maths and verifying that the 15 amp circuit powering our ceiling fan got the go-ahead, we moved on to the planning phase…
Step Two: Devi Have a go at it Your Ceiling
After turning off the breaker and removing the ceiling fan, the guys spent an good afternoon measuring, marking for studs and joists, and creating a constellation of push-pins in the ceiling to represent the various light configurations we could chose from (while R's mom and I watched from beneath and muttered helpful run-in of encouragement like, "this is crazy," and "are you sure we should constitute doing this?!")

Working around the hole from the ceiling fan and an existing eyeball public eye centered over the fireplace, here's the design we came up with for five unaccustomed lights:

You'll notice our plan doesn't actually utilize the original cap fan jam. That's around because the past owners had stuck a piece of wood in in that respect to corroborate the fan, and we couldn't be bothered to deal with IT. Instead, we definite to speckle the existing muddle and impress the wires over to a fresh cakehole for our center light.
Step Deuce-ac: Pick Out our Lights
There are 2 components to a deep-set light: the can (a metal can that hides inside the cap and houses the thin bulb) and the spare (that's the cosmetic part that surrounds the electric light, usually flush with the cap, and conceals the talk of the can).
You'll see two types of cans:newly building cans (which have a boxier design that affixes to framework before Sheetrock has been installed) andremodel cans (for buffoons like us, who just require to hack a hole in the ceiling and stick a clear there). Unless your lighting project involves tearing down your cap to the studs, you'll want the remodel cans.
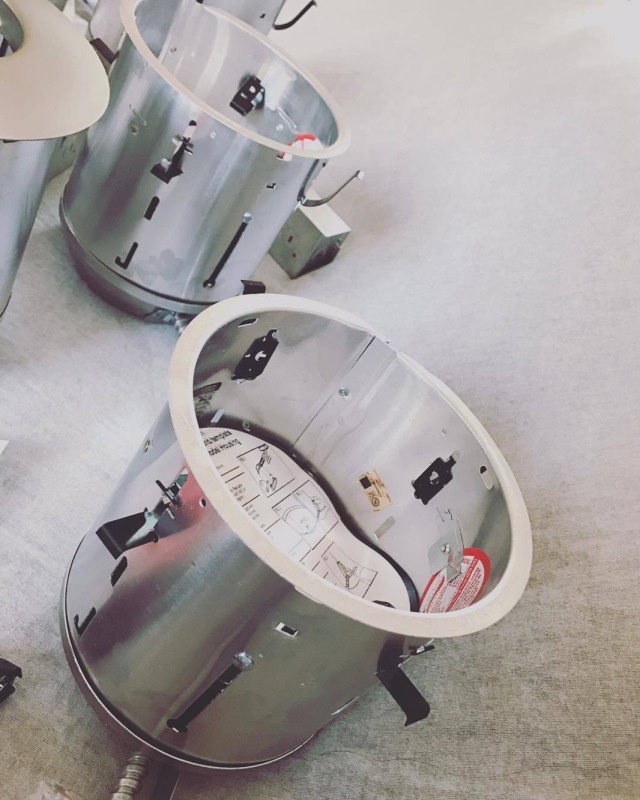
To mates the existing hollow lights in the kitchen, we chose to use the same 6″ satin atomic number 28 trim on our new recessed lights. We wanted the eyeball light complete our hearth to jump out from the rest of the recessed lights, merely we also wanted it to look united with the rest of the room… so we found a matching satin nickel trim set to upgrade IT.
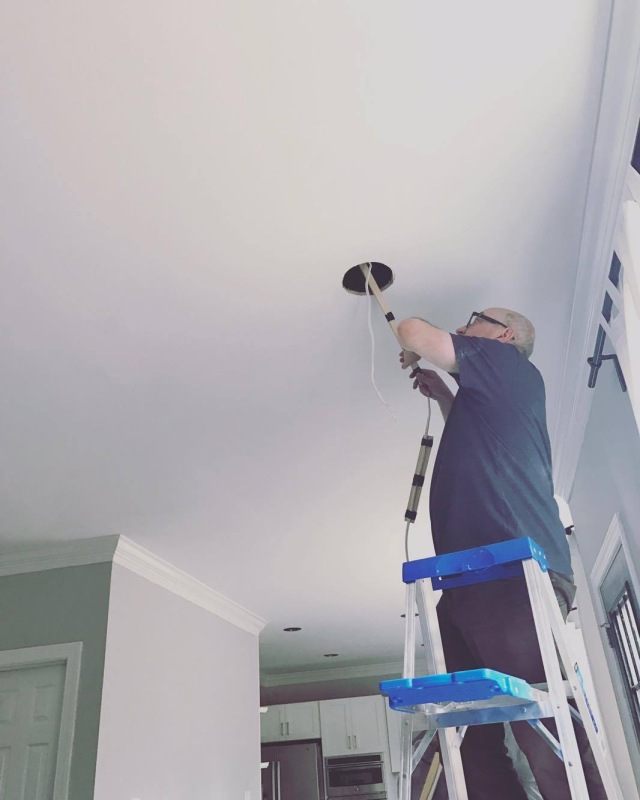
Gradation Four: Cutting Holes
When all the calculating, marking, planning, shopping, and prepping was done, it was time to finally put on both holes in the ceiling.
We all exchanged an apprehensive glimpse, acknowledging that we were about to take the opening move beyond the point of no yield.
The adjustable hole cutter we used looked like the lovechild of Freddy Kreuger and a drill bit.

You set the dimensions of your hole (in our casing 6″), then stick on to your drill along with a large plastic cup / shield that collects whatever falling debris.

In a display of my renewed self-assurance in this project, I volunteered to climb the run and clipped our first hole (a theatrical role I very quickly passed to R's dad, after realizing just how very much upper body intensity level it requires to Balance on a ladder spell simultaneously butchering your cap with tiny spinning razorblades).
It's the kind of job that sucks so untold, that when your reward drywall sinker finally waterfall from the ceiling, you don't even question why the drill pickle is off center…

Ingeminate four more times.
Step Five: Laughably Impossible Wiring
Recessed lights are designed to be chained together, making it incredibly easy to carry power into one mending, then out to the next using 14/2 Romex.

Fun FYI: Romex is rated by gauge / number of conductors, so 14/2 would be a 14 standard of measurement wire with 2 conductors (dishonorable and white) plus a bare ground electrify. #TheMoreYouKnow
Here was our plan for wiring the lights:

Don't let the diagram fool you, this wasa loteasier said than done. R and his dad had to drill hole through and through joists and snake wire to and from each locating, all through with the tiny 6″ holes in the cap.
Needless to say, imaginative genius ensued…

#EnglishEngineering
The pups and I busied ourselves doing the only thing we really could do at that point: ascertain in fear.

They pulled it off!

Step Sextuplet: Wiring the Lights
We double checked that the breaker was off and secondhand a voltage tester to piss sure all of our live wires were as dead as a doornail.
Past, using push-in connectors on the light housings and the Romex that had already been fed to and from each hole, R and his dad connected the lights…


…piece I installed a new dimmer switch.

(A note about dimmer switches: rightful ilk your circuit, these guys possess a maximum capacity. The dimmer we used could handle up to 150 watts of LED bulbs, or 600 watts of standard light bulbs).
Finally, it was time for the here and now of truth… time to slide the lights into the cap and turn the breaker back on.


Annddd…. tah-dah! Let there be (recessed) light!

Disclaimer: we are non professionals, and this post is simply a regurgitation of what we noninheritable while attempting to install some lights in our home. DIY at your ain risk!
This post contains affiliate golf links. For more information on what that means, check out the Dreaded Disclosures Page.
How to Replace Ceiling Fan With Light Fixture
Source: https://accidentalsuburbanites.com/2017/03/13/replacing-a-ceiling-fan-with-diy-recessed-lights/